Integration Steps - Unity Plug-In for Android
Overview
With Chocolate Mediation SDK Unity Plug-in, you can enable Full Screen Interstitial and/or Rewarded Video Ad Units in your Unity game. Our SDK is also GDPR compliant.
Total Added Footprint for all above partners including the Google Play Services Ads and Android Support Libraries: 4.3mb after building a final release APK.
Integration Steps
Note: Our integration steps have changed. Please read these instructions carefully.
1. Download our Chocolate Ads Mediation Unity Package:
ChocolateMediationPlugin-1.0.6.unitypackage (New!)
Import it as a Custom Unity Package:
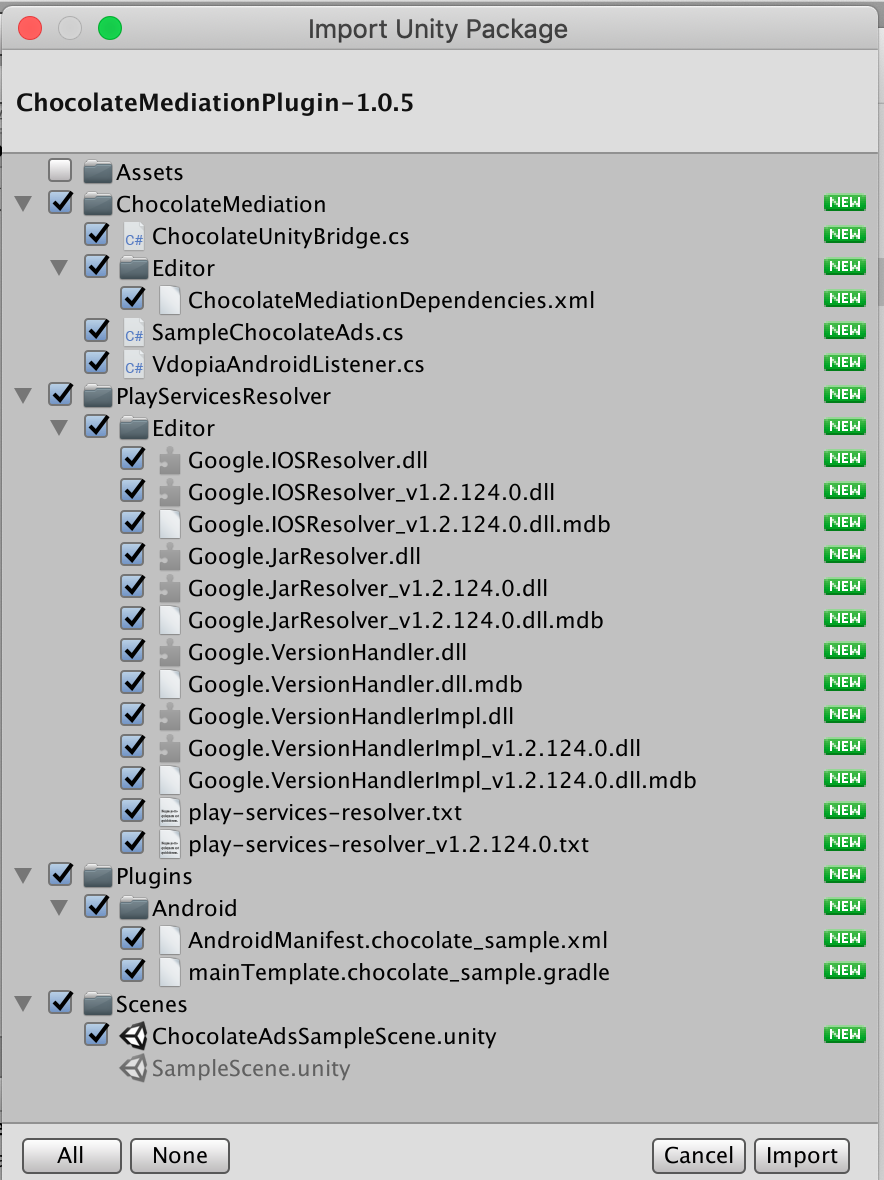
Note: If you are currently using VdopiaListener.cs (Old) and VdopiaPlugin.cs (Old) in your project from a previous integration, please remove those. If you had a previous version of ChocolateUnityBridge.cs and VdopiaAndroidListener.cs you can remove those as well. The new unity package places the new scripts in the Assets/ChocolateMediation folder.
2. Integrating Full Screen Interstitial and Rewarded Video Ad Units
Refer to code sample below. The flow is easy; allow a few seconds for the sdk to initialize. Then, call loadRewardAd (or loadInterstitialAd) and wait for the callbacks. Implement the callback interfaces. Un-register callback listeners when necessary. That’s it.
We also supplied a sample scene ChocolateAdsSampleScene.unity and the corresponding script SampleChocolateAds.cs which displays the ad when you click on the load ad button.
3. Building the Android App
Note: If you are using older Unity 5.x, please skip to Export below.
If you are using Unity 2017, or 2018+ then continue as follows…
This is where you will configure your Unity project for building Android app.
In Unity, open ‘Build Settings’. Choose ANDROID. Do not build until all the steps have been completed.
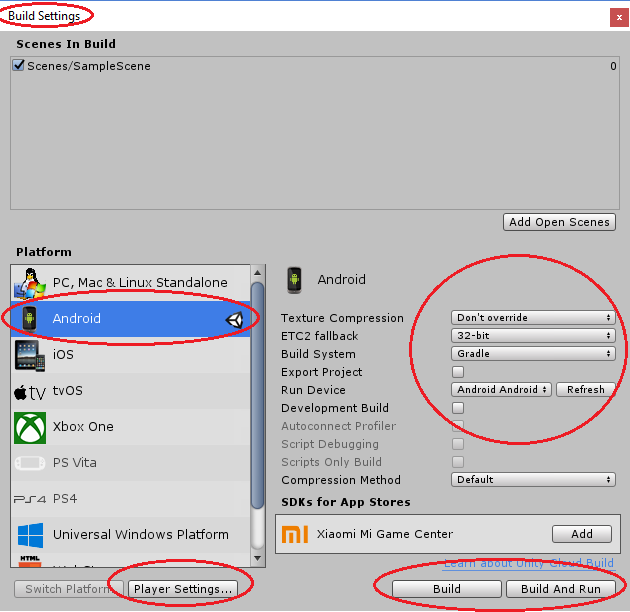
From ‘Build Settings’ click on ‘Player Settings’. Then, choose ‘Publishing Settings’. Make sure to check Custom Gradle Template. Unity will create: Assets/Plugins/Android/mainTemplate.gradle which you will edit soon.
You don’t need to use ‘Minify’ or ‘proguard’. However, if you want to use these, there is a section towards the end about this topic.
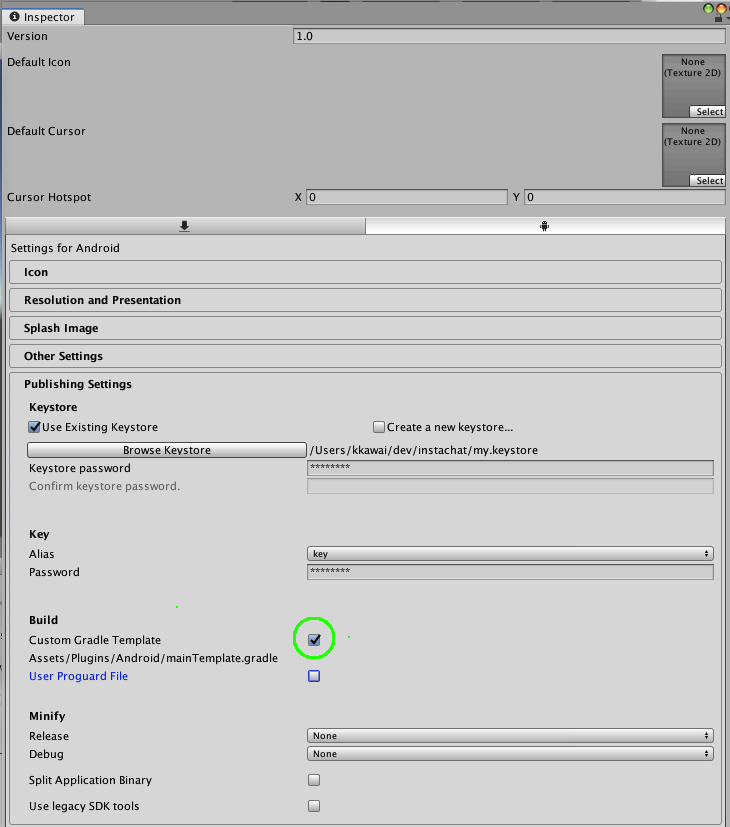
In ‘Other Settings’ under Player Settings, make sure Minimum API level is 17. The Target API level should be ‘Automatic (highest installed)’.

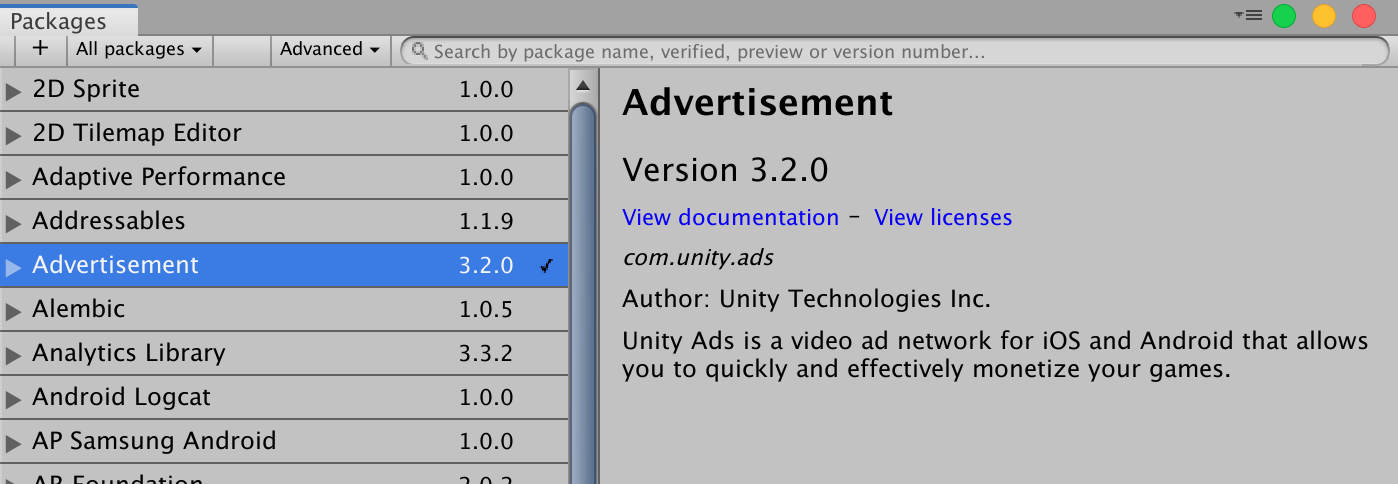
Install Advertisement Version 3.0.3 or Greater (Advertisement 3.4.0 recommended)
Unity → Window → Package Manager
Our Chocolate/Unity Ads adapter depends on Unity Ads Package 3.0.3 (or greater) to be installed via the Package Manager. Please make sure this is reflected as follows, otherwise the game will crash with “ClassNotFoundException UnityAdsListener”.
Please install the latest version of Unity Ads Package.
4. Edit mainTemplate.gradle & AndroidManifest.xml
If you are using Unity 5.x or lower and you have exported your Unity project to a separate Android project, you will be editing build.gradle and AndroidManifest.xml following the instructions in this step.
If you are using a newer version of Unity (2017, 2018 or higher), open Assets/Plugins/Android/mainTemplate.gradle in your file editor.
First, remove the following line at the top of the file:
// GENERATED BY UNITY. REMOVE THIS COMMENT TO PREVENT OVERWRITING WHEN EXPORTING AGAIN
Continue editing…
//ROOT LEVEL
android {

   defaultConfig {
      // ... other existing settings ...
      multiDexEnabled true
   }
}
//ROOT LEVEL
repositories {
    jcenter()
    google()
    maven { url 'https://jitpack.io' }
    maven { url "https://dl.bintray.com/vdopiacorp/sdk" }
    maven { url 'https://tapjoy.bintray.com/maven' }
}
Within the dependencies section (ROOT LEVEL), merge in the following block. This ‘dependencies’ section should already contain the line:
implementation fileTree(dir: ‘libs’, include: [‘*.jar’])
If it does not contain that line, then it is not the correct ‘dependencies’ section and you must find the correct one.
implementation 'com.vdopia.ads.lw:coresdk:2.8.11'
implementation 'com.vdopia.ads.lw:unity-plugin:1.2.7'
implementation 'com.vdopia.ads.lw:adcolony-adapter:4.1.1'
implementation 'com.vdopia.ads.lw:amazon-adapter:5.9.2'
implementation 'com.vdopia.ads.lw:applovin-adapter:9.8.4'
implementation 'com.applovin:applovin-sdk:9.8.4'
implementation 'com.vdopia.ads.lw:google-adapter:16.0.0.c'
implementation('com.google.android.ads.consent:consent-library:1.0.7') {
  exclude group: 'com.android.support'
  exclude group: 'com.google.code.gson', module: 'gson'
}
implementation 'com.vdopia.ads.lw:tapjoy-adapter:12.2.1'
implementation 'com.tapjoy:tapjoy-android-sdk:12.2.1@aar'
implementation 'com.vdopia.ads.lw:unity-adapter-no-jar:3.4.0'
implementation 'com.vdopia.ads.lw:criteo-adapter:3.2.5'
implementation 'com.vdopia.ads.lw:vungle-adapter:6.4.11'
implementation('com.github.vungle:vungle-android-sdk:6.4.11') {
  exclude group: 'com.android.support'

  //Note: If you already have gson2.x.jar in your Android folder then you need to exclude as follows.
  //Otherwise, you will get Multidex build error.

  // exclude group: 'com.google.code.gson', module: 'gson'
}
implementation 'com.android.support:multidex:1.0.3'
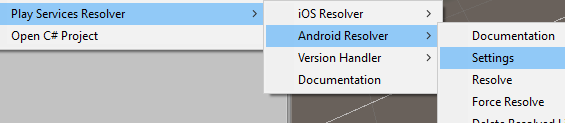
5. Play Services Resolver
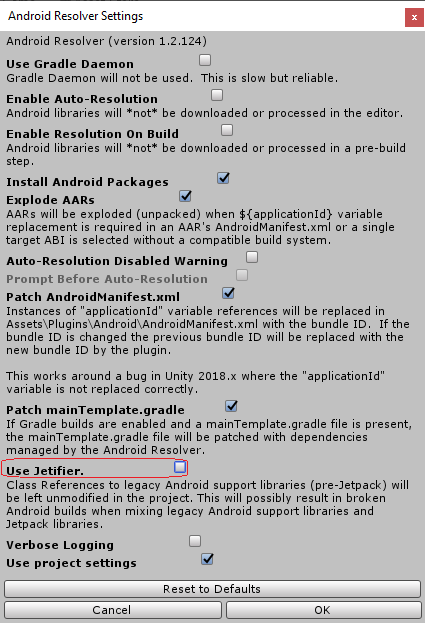
After you have made the changes to mainTemplate.gradle, check Resolver Settings under Assets file menu:
If there is an option to Use Jetifier, please make sure it is Not Checked. Hit OK.
If you do not see this option, then just close the Resolver Settings dialog.
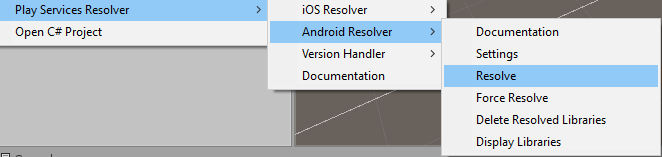
Now, you may resolve dependencies via Assets file menu:
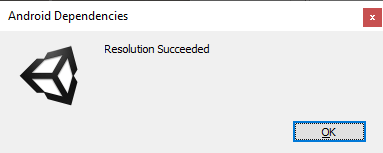
If resolution was successful, you should see:
Note: If you have previously integrated Chocolate and had to manually copy in the following files to the Android folder, you may not need them anymore. The Play Services Resolver may actually remove them after you click resolve.
com.google.android.gms.play-services-ads-base-16.0.0.aar
com.google.android.gms.play-services-ads-identifier-16.0.0.aar
com.google.android.gms.play-services-ads-lite-16.0.0.aar
com.google.android.gms.play-services-basement-16.0.1.aar
com.android.support.support-compat-27.1.1.aar
com.android.support.support-core-ui-27.1.1.aar
com.android.support.support-core-utils-27.1.1.aar
com.android.support.support-fragment-27.1.1.aar
com.android.support.support-media-compat-27.1.1.aar
com.android.support.support-v4-27.1.1.aar
com.android.support.support-annotations-27.1.1.jar
Continue editing mainTemplate.gradle …
Android Gradle Version
Find the following line:
classpath 'com.android.tools.build:gradle:'
And notice the version. If your android gradle version is 2.3.X or lower, then you must replace keyword implementation with the compile keyword. If greater or equal to 3.0.X, then we are fine.
6. Finally, download our AndroidManifest.xml
and copy it to folder: YOUR_UNITY_PROJECT/Assets/Plugins/Android
Proguard
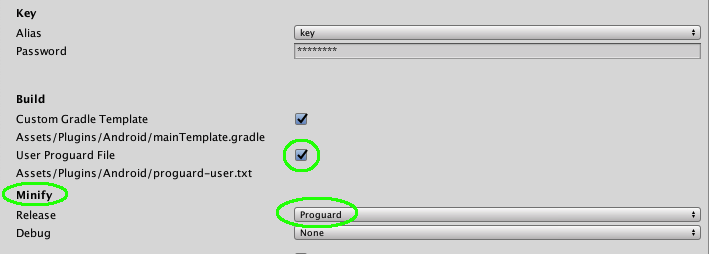
If you want to use Minify and Proguard, check User Proguard. proguard-user.txt will be generated in the Android folder. Append the contents with our proguard settings..
If you choose not to use Minify with Proguard, then choose None for Minify release and debug and uncheck User Proguard checkbox.
YAY! Now, you may BUILD the Android app. Click on the BUILD button from Build Settings in Unity. This will produce the signed APK file that you can release to the Google Play Store or install and run on an Android device.
If you have an Android device connected to your computer, you may click on BUILD AND RUN.
Exporting to Android Studio
If you are using an older version of Unity (such as 5.x or earlier) OR if you prefer to have more control over your Android app, you may choose to export the project to Android Studio.
Install the latest Android Studio
- Complete the above Unity steps 1-3
- Open ‘Build Settings’, check the ‘Export Project’ checkbox and hit the ‘EXPORT’ button.
- Choose a folder where you wish to save your Android Studio project. Then, open the project using Android Studio.
- Go to Edit Gradle and AndroidManifest.xml
After opening the project, Android Studio may show dialog notifications to update to the latest android gradle version. Please accept those requests.
How to turn on ads on your ad unit
Please send us your sample app with the integrated code. We will help you validate the SDK setup and turn on the demand.
Get started using our test key: "XqjhRR"
You can contact us via email: sdk-support@chocolateplatform.com
![]()